Mounting a Reloading Press
Bench mounting a press is exactly what you would think it is. You use the holes in the base of your press to fasten your press to bench top. Most presses will include a set of mounting bolts, but if yours doesn’t, then go get a set of shoulder bolts. Make sure the shoulder is the same diameter as the holes in the press. This will reduce the amount of play if the bolts loosen. Also, your press is going to see a ton of vertical force in both directions as well as rotational forces. This is why you want to use a bolt/nut rather than a lag bolt. If you use lag bolts and it gets sloppy, you will have to drill it out and replace it with a bolt/nut anyway. Wood screws are out of the question since the holes in your press are a larger diameter than your screws.
An elevated mount or riser is a steel frame that allows you to mount the press to a frame rather than directly to the bench. The frame is then mounted to bench. This does two things:
- You raise the press 8-10″ above the top of the bench.
- It distributes the load of the press over a greater surface area.
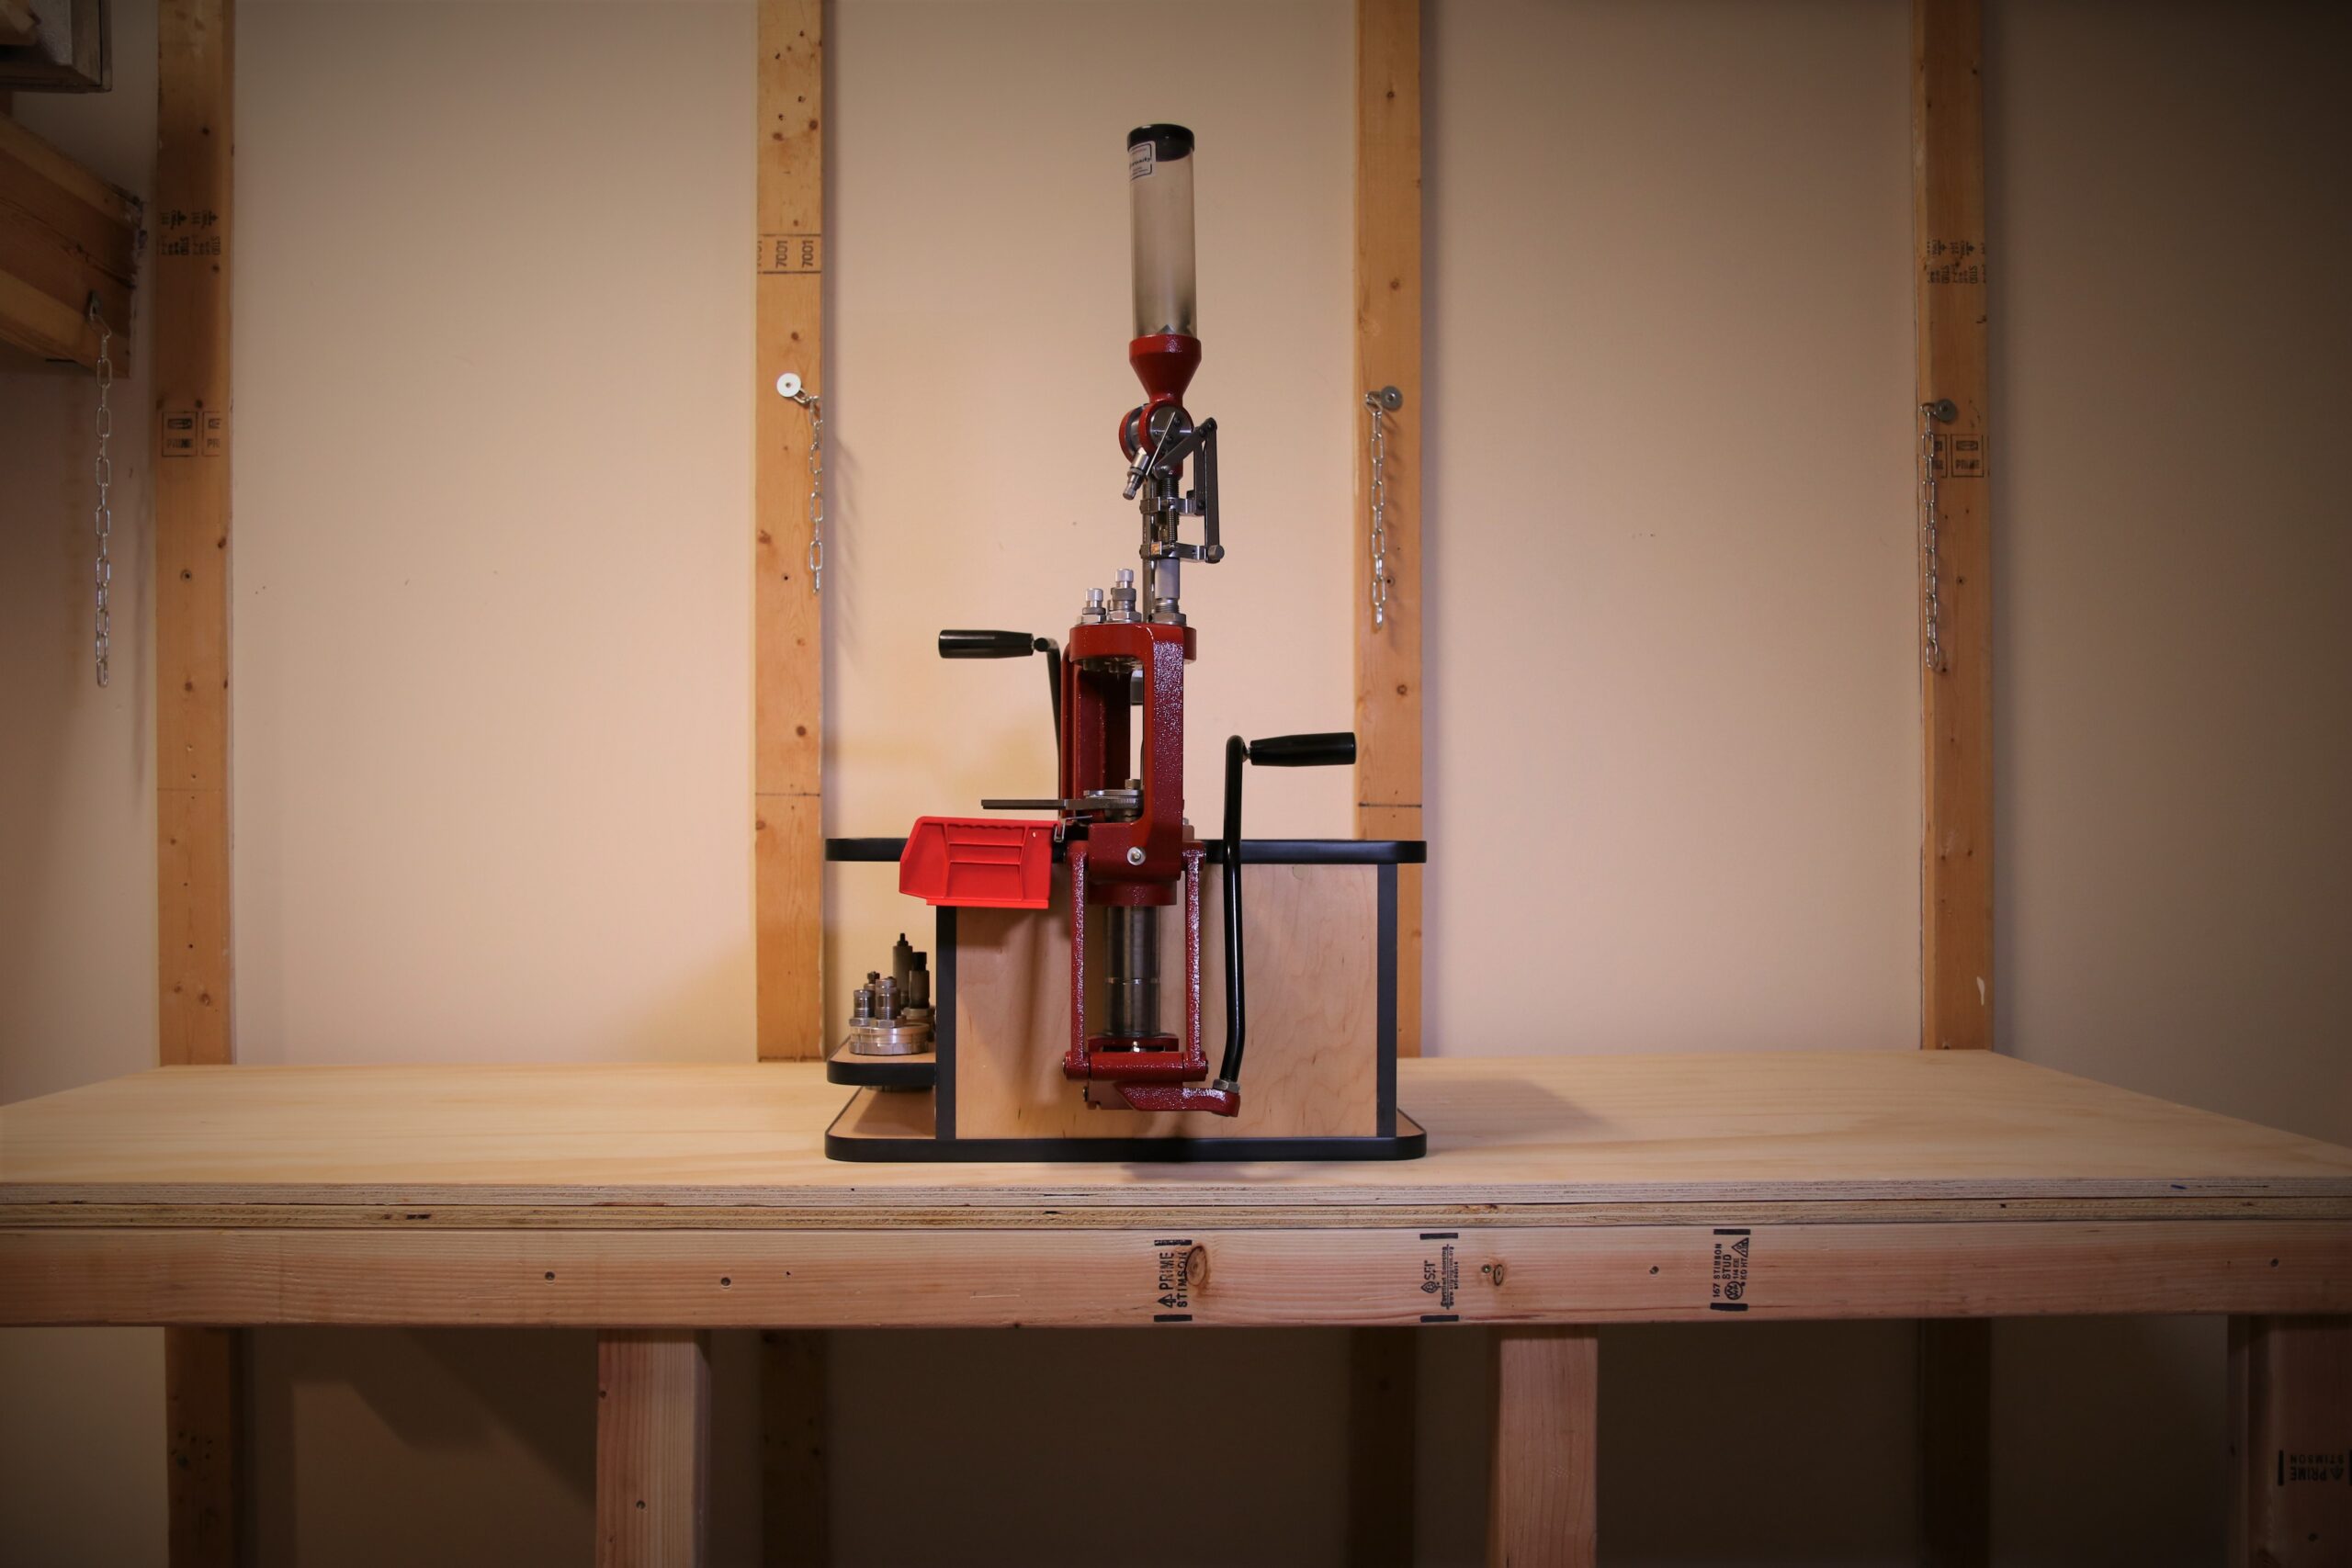
The base of the frame is generally 2 or 3 times the size of the base of the press, and generally has 4 bolts vs 2 or 3 on the press base. This comes in handy if the bench you are mounting to has a thin or weak top. The increased surface area might allow you to get away with less material, or prevent increased wear to the front lip of your bench. You will generally hear these refered to as Strong Mounts (Made by Dillion) or Ultra Mounts (Made by Inline Fabrication for everything). Here is a picture of my buddies LNL mounted on an Inline Fab Ultramount.
ERGO Levers
I was stunned at how much the handle size/shape effects how you reload and the optimal height of your bench. It makes sense when you think about it, but you would assume the manufacturer would use the best solution. You know what they say about assumptions; you’re right to assume that truckstop bathroom gave you herpes.
All of the major manufacturers of presses ship them with a simple straight handle with a ball on the end. It works fine, but if you reload often or in high volume this is the first thing you should upgrade. Several people make upgraded handles, but the most popular is Inline Fabrication’s ERGO Roller Lever. Rather than just having a straight tube with a ball on the end, the ERGO roller has a series of bends and a roller handle.

This does two things:
- The bends allow you to go from the top of stroke to the bottom without moving your hand as far up and down. Decreasing the range of motion ensures you are not having to bend over as much.
Top of Stroke:
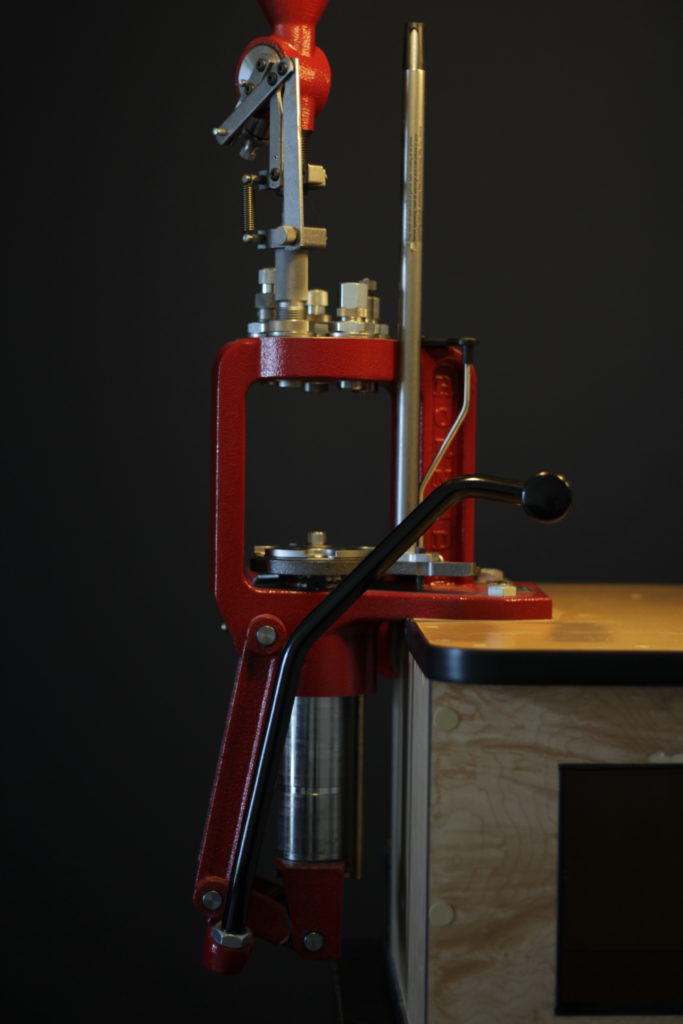
- The roller lever allows you to maintain the same grip on the handle at all times. If you’re just holding on to the standard ball you will have to adjust your grip depending on where the handle is.
Reloading Table Height
One of the most important things to look at is the height of the bench vs the press vs you/your chair. The two previous bullet points (lever and riser) needed to be taken into consideration first, because you only get one shot at bench height. You want your bench top to be at a comfortable working height because you’ll be handling a lot of things on the bench (calipers, scales, case gauges, loading blocks, tools…etc.). The less moving you do the better. Any unnecessary repetitive movement is wasted time and energy.
Are you planning on sitting, standing, or both? Your natural reaction may be “who the hell stands while they reload?” The answer is simple: millennials. Sitting is great until you want to get up and stretch. Standing is great until your feet start to hurt. I take the best of both and make my reloading set up work while sitting or standing. Many people, myself included, like to look down on the press so that they can see into the case mouth and check powder presence (I’m too lazy to dick with powder cop dies).
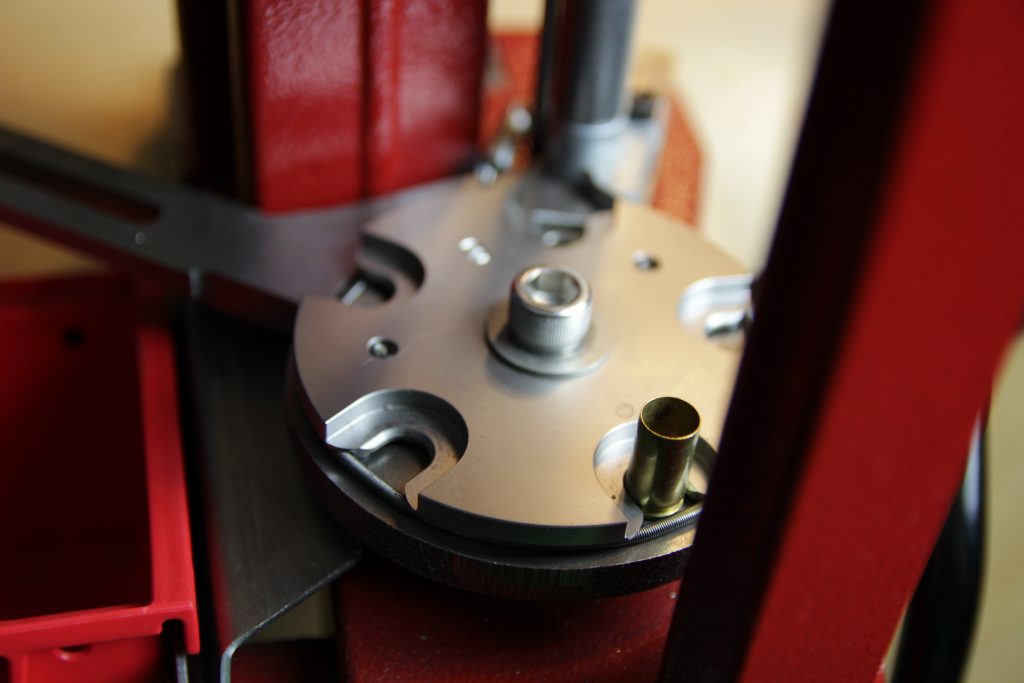
This is a great idea as long as you consider how far the press handle has to travel down. You don’t want to be looking down on the press and having to bend over to move the handle to full stroke. You also don’t want to have to stand up after every stroke to see if a case has powder.
If you’re running a progressive on an Ultra Mount then your press is sitting above the bench top, and that’s where your arms will be most of the time. If your loading on a bench-mounted single stage and have a couple of loading blocks then most of your time will be spent at bench height. I prefer a bar height table with the press mounted on a riser (or in my case a portable bench). It’s a perfect height for me when standing, and only requires a bar height chair for sitting. I can see into the case mouth and do not need to bend over to reach the bottom of the stroke.
Reloading Bench Materials
Lets talk materials. Something not many people think about initially is the flooring. If you have shag carpet you will spill 85% more powder than if you had a concrete floor, because the universe hates you. Vacuum cleaners will absolutely set off primers, trust me on this. Also, primers are designed to roll as far away from you as possible if/when they are dropped. They also are designed to roll under furniture, and to the nearest brown recluse. The best case scenario is epoxied concrete floors with nothing a bullet or primer can roll under.
Wood is what you want to build your bench out of. Anything else is overkill, an everyone love a quick woodworking project. Plus the more metal and Plexiglas you use the more you need to consider static electricity. This is one of those situations where keeping it simple is the way to go. As long as it is sanded to the point where you won’t get splinters, that’s all that really matters. There isn’t any need to stain or paint it unless you want to.
You wife is right, thickness is key. We got almost all the way through a post without a dick joke, what a shame. I would go with 3/4″ plywood as a minimum for the table top, any thinner and you risk flexing. The less support you have under the bench top, the thicker the top needs to be. If you’ve got the money and the time to carve the bench out of one giant redwood stump then you should do that. It will be an extremely sturdy bench, and you’ll be the coolest reloader on Instagram for 45 minutes.
This is one of those situations where the more weight the better. If your reloading bench is stand alone and is not bolted down then it can walk all over the place. If it’s heavy it will greatly reduce the tendency to move. If you’re telling yourself that you’ll be gentle with your press then you’ve never reloaded 30-06 with crimped primers. Depriming/resizing takes the most force by far, and if you don’t use enough lube then the case can get stuck in the die and the down stroke will be a little violent. I’m just gonna walk right past that one…
Storage For Reloading Supplies
Reloading is one of those hobbies that is equipment forward, like riding motorcycles, or running a sex dungeon. The equipment you need to store can be broken down into three main groups:
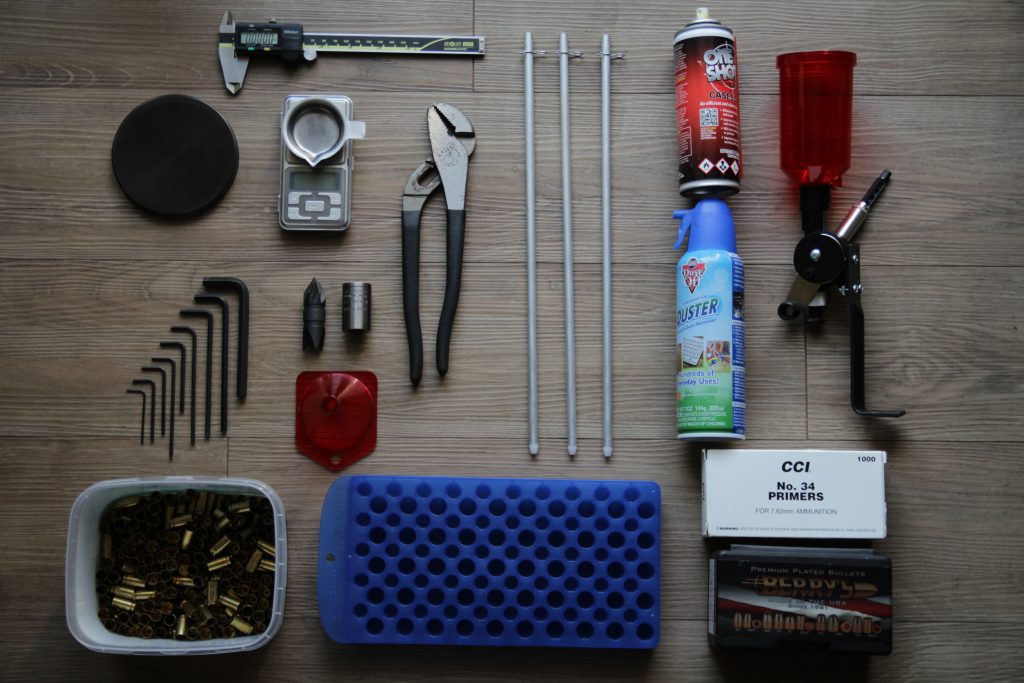
- Metrology: Calipers, Powder Scale, Case Gauge. These are components you’ll want out and easy to reach, ideally on the bench top, since you’ll use them often.
- Tools: Allen wrenches, Open end wrenches, Dies, Flat-blade screwdriver, Chamfer/Deburr tool, Air duster, Case lube, Priming Tools (Primer flip tray, hand primer), stand alone powder measure. Which ones you need depend on your press and dies. If all goes to plan you’ll only use them for setup.
- Components: Brass, Bullets, Powder, Primers. These take up more room than you think, and you need constant access to them. Case feeders and bullet feeders help since the storage is elevated, but we’re not all made of money.
As you can see the tools add up, and you’ll need access to most of them while you’re reloading. This is why I advocate for building the largest bench you have room for. Also, unless I’m reloading I don’t keep powder out. If you store it in your powder measure it will go bad, and locating them all together on the bench top is a bad idea. Different powders can have similar colors and numbers. The best method is to keep all of your powder in a single area separated from your bench top.
To recap:
- Separate from your significant other.
- Let them take the kids and you keep your house which is now a 2400 sqft reloading room.
- Build a big bench out of wood with room for tools.
- Mount your press on a riser and replace your POS regular handle with an ERGO Roller Lever.
- If you need something portable download these reloading bench plans:
- Make it bar height and get a sweet ass bar height padded swivel chair with a back.
- Reload.
- Beer.